June 10, 2011
by admin
Comments Off on Pay yer Piracy Penance

Pay yer Piracy Penance

Do you use bittorrent now and then for useless shiny things? How ’bout sharing something useful while you are online?

It won’t keep the MAFIAA lawyers dragging your ass to court for downloading the latest Justin Gaga or Ladyboy Bieber CD but you may feel less dirty by sharing this.

Cd3wd is a free but high quality collection of practical How-To Technical Development Information – helping the 3rd world to help itself.
There are 4000 titles, totalling 13 gigabytes.

When I’m online I fire up my bittorrent program and it shares out this huge collection of materials that although intended for 3rd worlders, DIYers and modern homesteaders will find it useful.

You can browse the contents of the distribution here
http://www.cd3wd.com/CD3WD_40/CD3WD/index.htm

You can download the torrent file here
http://smartliketruck.com/torrent/CD3WD%204.0%20Full%20Archive%20ISO.torrent


May 28, 2011
by admin
Comments Off on NoSpamNX for WordPress Works!!!

NoSpamNX for WordPress Works!!!

From near day one of setting up this blog using WordPress, I’ve been using the NoSpamNX plugin to filter out spam comments to my measly articles. This evening was the first time a spam snuck through, pretty impressive, 74 spams blocked, 1 got through.

As I understand it, the way NoSpamNX works is it adds extra fields to your comment form that are hidden from a regular person viewing through a regular browser. A spambot on the other hand sees these hidden fields and cannot resist filling them out, any comments submitted with data in the hidden fields automatically gets flagged as spam.

If you want to have comments on your blog without forcing readers to log in or interpret one of the various types of captchas give NoSpamNX a try.

Now if only I could write something interesting enough that a non-spambot would want to comment on.

May 4, 2011
by admin
Comments Off on Preppin’ a Metro Pt. 1

Preppin’ a Metro Pt. 1

First off let me say I love these little cars, but my budget at this time doesn’t really allow me to buy a newer, better maintained one. The reason I call my two Metros beaters is because they really are if it wasn’t for me keeping them on lifesupport of tons of small fixes, and bloody knuckles they’d be organ donors in the junkyard. If someone dropped a rust free chassis of one of these cars off in my yard, I’d have mile wide smile on my head for a long time to come.

I need to write a boilerplate disclaimer to link to here, but for the time being let me say I’m not a licensed mechanic, anything I do here could probably be dangerous, illegal, immoral, fattening or just plain stupid. If you hurt yourself or others by copying me do you really think anyone won’t laugh at you for copying something you seen on the internet, at a site called SmartLikeTruck.com no less.
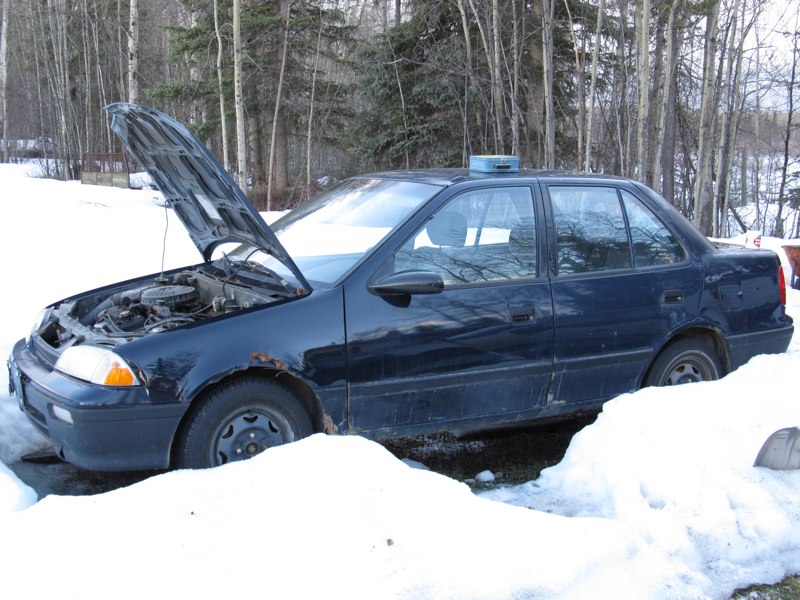
Last summer I purchased a 1993 Geo Metro 4 door sedan with 18X,xxx km as a parts car or replacement for my current 1992 Metro sedan with 28X,000 km. On my older Metro was getting excessive tire wear and reduced gas mileage was the result of the sloppy suspension, so parts were sourced and ordered. While I was waiting for the new parts I made the decision to switch to prepping the newer Metro. The suspension parts on the new beater were coming due for replacement, and I’d really like to drive one of these cars with a fresh suspension so it was no loss by ordering the new parts.

The newer Metro has parts that are in better shape than the older Metro, and many parts that are in worse shape. Essentially I’ll be taking two crappy beaters and making one better beater. The reason I decided to switch to the ’93 is that transmission is in better shape and the engine compression is still in the decent range. Compression is better on the ’92 but that is due to me doing valves, rings and rod bearings a couple years ago, so If decide to hotrod the motor on the ’93 I have a decent engine to swap in in the interim.

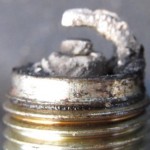
Inspected plugs and wires while doing the compression test…

Nice huh? The plug connector slipped out of the plug boot with very little effort and was rusty as can be. Fortunately plugs and wires were in much better shape on the ’92 so I swapped those in. The white on the plug is might be an indicator that the valve guides and seals are getting too sloppy and oil is getting past. This cars oil was overfilled when I bought it, probably over compensation for what appears to be a leaky valve cover, so oil may have been getting into the upper cylinder via the pcv tube and intake. So I’ll try correcting the valve cover leakage before I pull the trigger on replacing valve guides and seals.

Next I removed the stock snorkel that goes from the front passenger side fender to the air cleaner, this makes the engine bay a little louder, but it is a small sacrifice to pay for less restrictive air flow.

To further reduce unnecessary restriction  I removed the two bridges inside the air cleaner and made some bolt down tabs to hold the filter housing in place. A piece of vinyl tape was put over the now unused hole in the top of the air filter element.
I got a start in weight reduction, rumor has it that every 15lbs of weight removed from these cars is like adding close to 1 horsepower, of course YMMV. Covering the bottom pan of the trunk and cab of these cars is a thick asphalt pad intended to be sound deadener, aside from being damn heavy, I find it to be not all that effective. If underbody noise bothers me I’ll use a spray on or Dynamat type solution. I’ll post a total weight of this crap once I have removed it all.

junk in da trunk

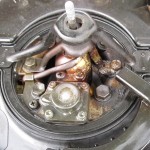
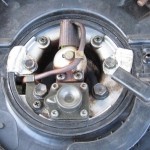
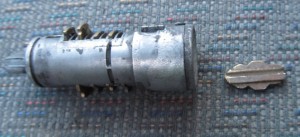
This ’93 had a key broken off in the ignition so I had to take apart the dash around the steering column and disassemble the ignition assembly. Fortunately someone had been in there ahead of me and had already done the drilling and grinding with a Dremel type tool. If you are not so fortunate and have a key broken off or need to change the ignition lock here is a picture of the two security bolts you must cut a slot in to remove with a screwdriver.
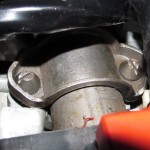
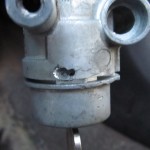
The trick that whoever pulled the ignition lock cylinder used to remove the teensy roll pins holding it in was to drill a small hole next to the pin so that a dental pick or like tool could be used to remove the roll pins.
Since I already had some of the dash apart I decided to add a tachometer, if you don’t have a tachometer in your Metro you may be able to find a Metro gauge cluster in the junkyard with one, be advised if you get a cluster from a 4 cylinder Metro and put in your 3 cylinder Metro you will have an incorrect rpm reading. There is a workaround on the Teamswift forum if you are handy with a soldering iron. I had a small aftermarket tachometer so I spliced it in and mounted it in the front of my existing cluster.


I guess that’s enough for the first installment in what I can assure will be many.

Any questions, suggestions, or constructive comments would be greatly appreciated.

February 27, 2011
by admin
Comments Off on Boots Built for Berzerkers

Boots Built for Berzerkers

Dunlop Purofort Thermo+These boots were made for stompin

I’ve just started work back on drilling rigs and had to pick up new boots since my old ones were no longer up to the task. The winter boots of choice for righands up here are Dunlop Purofort Thermo+ Safety. I’ve seen them in white, orange and the oh so popular, tacticool OD green. The soles have a super heavy open lug tread, which are not only cushy, but provide much needed insulation when standing on steel flooring at -20°C and colder. The company advertises them as warm enough to -50ºC, but at -35ºC or so these boots are like walking around in downhill ski boots.

Another aspect of these boots is chemical resistance, deep drilling requires the use of invert drilling mud which is a mix of base oil, barite, hydrated lime, caustic, and a plethora of other mud additives. This nasty mixture is so hard on and ruins so much of your gear that the drilling companies pay you an extra daily amount as soon as invert is in the mud tanks. These boots stand up to this attack day after day, week after week.

The boots I had last time I worked on a rig were made by Viking, they were made of the same polyurethane material, and had a very similar heavy lug sole. The only reason my Viking boots were no longer up to the task was a split developed at the top front seam, and due to my inattention and abuse this split carried on down the front of the boot. They’re no longer suitable for the rigs, but have been re-purposed for around the yard. No one else that I seen on the rig that had Vikings seemed to have the seam problem.

If you need a boot that will get you through months of extreme heat, cold, shit and abuse check out a pair of Dunlops, they’re about $200 but worth every penny. I’ve not seen much mention of these boots outside of the oilpatch, so that’s why I brought them up here, more people need to know about these truly kick ass boots.

January 22, 2011
by admin
Comments Off on Shame On You Samsung

Shame On You Samsung

I recently received a Samsung CL 315 color laser printer as a hand-me-down and I tried to fire it up. It turns out the issue with this printer is that 2 of the color toner cartidges are “empty”, I pulled the cartridges out and they clearly have toner left in them. Since the printer thinks that these two cartridges are empty it refuses to print even black and white (greyscale) documents. No amount of playing around with the printer or the drivers has convinced the printer to spit anything other toner empty error messages, and web searches for hacks to re-enable the printer have come up flat, thus in bold large type I call out

Shame On You Samsung

There is no good reason that this printer which has a full black toner cartridge can’t continue to print in greyscale mode if the color tanks are empty. I do understand that this problem is not limited to just Samsung, but this is the most expensive printer I’ve run across that does it. If this printer did print with remaining toner and didn’t have software that holds remaining toner hostage I’d gladly buy replacement cartridges as I need them. Since I can’t even get this printer to spit out a single page there is no bloody way I’m going to shell out a hundred or more dollars just to test if the printer functions at all.

Now, what is probably a perfectly fine printer will be dropped off at the recyclers, from where it will be shipped all the way across the Pacific to be ground up and have a fraction of it turned in to your next piece of crap electronic doodad, all thanks to some group of idiots at Samsung that think extortion of customers via printer software is an acceptable business model.

Right now I’m pretty pissed about this and I got the printer for free, imagine the cumulative anger ’round the world of all those out there that laid down their own banknotes to buy this printer only to have their inital investment held hostage by a little bit of firmware.

Did I already mention

Shame On You Samsung

December 31, 2010
by Alleyne
Comments Off on Portable Wood Stove review – Updated

Portable Wood Stove review – Updated

The Great Northern Camp Stove

I bought this little wood stove about a year ago, because I was impressed with it’s quality of construction to price ratio. Which was something in the neighborhood of $100 at Princess Auto. Like a boy with a new toy I tried it in the back yard soon after getting it home, plus I needed to do the first burn outdoors to burn off any oils on the metal and nasties emanating from the paint. I then boxed it back up for installation later in my little trailer workshop.

Compared to other portable wood stoves I’ve seen, this stove is much heavier gauge steel and is wire feed welded next to others that are tin can thin and spot welded.

The choice of buying it, trying it in the back yard, and then not installing it in my little workshop for over a year was a mistake.

Aside from better materials and build quality, this stove has one primary issue that can not be ignored. When you start the fire or open the door to feed it, it will smoke you out. No amount of damper control or door open & close speed can negate this, when you go to feed it you must have direct ventilation because the smoke pours out. The reason for this problem as I see it is the chimney pipe is only 2 1/2″ tubing, thus way too small, which may be great for portability but doesn’t work for actual usage in a ice shack, a wall tent or in my case a tin trailer. Whoever first built this stove did not go beyond testing it in the backyard before getting a bajillion of them welded up in China.

There are a few other problems with this stove

  • There is no internal baffling, thus making in an inefficient burn, baffling can allow sort of a second burn were the carbon monoxide and creosote in the smoke burn at a high temp. The ‘reburn’ will reduce the amount of pollutants emitted and creosote build up in the chimney.
  • When the stove is heated up the vent on the backside becomes near impossible to adjust
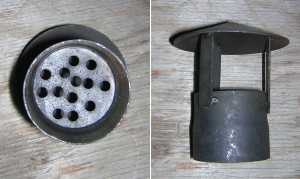
  • The little chimney cap they give you puts even more of a restriction on the already poorly chimney

Since I bought it over a year ago, and I don’t have an alternative for being able to work in my shop in cold weather, I’m kind of stuck with it. So for the time being I leave the door open while starting the fire, and open the door wide when feeding it.  To fix it I’ll need to grind and weld a new chimney flange on it. I’ll likely go with whatever the common size is for a pellet stove, which I believe is 4 or 5 inch.

So in summary I would not recommend buying this wood stove unless you have replacement chimney and a welding setup handy to alter it. The one exception might be if you needed an easy to carry stove for camping when there is a campfire ban.

While writing this up, I did come up with an idea that may make this stove work better with little modification. I’ll try an insulating fiberglass wrap along the lines of automotive exhaust header wrap. This may work along the lines of what gives a rocket stove such good draw.

Update Dec 31, 2010

I stopped at a muffler shop and bought a 3 foot piece of 2.5 inch exhaust pipe expanded on one end so that if fits on the end of the existing chimney pieces. This significantly helped with the draw, reducing the amount of smoke that escapes when adding wood to the fire. It still smokes more than I would like, but makes it much more bearable.

I noticed on the Amazon listing for this stove that customers who bought this stove also bought preparedness books such as How To Survive the End of the World As We Know It by James Wesley, Rawles and Where There Is No Doctor. Lets hope that they don’t wait till the Schumer hits the fan to try the stove out, thus smoking themselves for extra flavor when the cannibals come a callin’.

December 6, 2010
by Alleyne
2 Comments

Lead Acid to Alkaline Battery Conversions

While I was searching for information on Nickel Iron batteries aka Edison Cells I stumbled upon something that is a complete gamechanger for diy backwoods low budget alternative energy.
You can take a heavily sulphated lead acid battery that still comes up to voltage but has little amperage output, switch out the electrolyte and you wind up with a nearly completely restored battery. Apparently the voltage winds up slightly lower, but the amps output is largely restored.

Safety

Take into account when handling lead acid batteries that they are both toxic and corrosive, thus pose many environmental and health risks. Wear appropriate PPE, work in a well ventilated area and dispose of any waste materials in a responsible manner. Even with appropriate precautions bad things can happen, so attempt this at your own risk. I should be able to go without mentioning this, but then again this is the internet and you may be Smart Like Truck.

Electrolytes

From the reading I’ve done so far there are several different electrolyte conversions that have been tested.

  • Magnesium Sulphate – common epsom salt
  • Aluminum Sulphate – common pickling alum
  • Copper II Sulphate – cattle footwash
  • Successful conversions seem generally to have 4 to 8 ounces of sulphate mixed with 1 gallon of water for electrolyte.

    Battery Selection

    The ideal battery needs to be in relatively good physical condition with little damage to the plates and low sediment in the cells. An easy way to determine if a battery will make a good candidate is if it is able to be charged to over 12 volts and hold that state over an extended time. The battery I’ve chosen for my first conversion currently holds over 12.5 volts and has done so for months, but this number dives when a load is applied with my load tester. A peek inside the cells shows water clear electrolyte and light colored plates. The battery also shows no external signs of damage such as swollen sides which would indicate the battery was frozen and thus the plates physically damaged. Extreme sediment of the cells can cause shorting and will show a low voltage even after a full charge.

    Cell Cleaning

    It seems the consensus among experienced battery converters is to do very little in the way of flushing or cleaning of the battery cells, dump out the electrolyte and pour in new electrolyte, this of course is for the ideal candidate battery. For less than ideal batteries you may increase your chances of success by flushing the cells several times with water, or in extreme situations flushing with a sodium bicarbonate (baking soda) solution then several washes of clean water.

    Charging and Cycling

    After you have replaced the electrolyte an initial test of the battery may not show the battery’s full potential. By discharging and recharging the battery (cycling) you further the conversion and condition the battery.

    Links

    Here are some links to some battery conversion pages out there

    Updates

    I’ll update this story as I learn more and  links to results of my own experiments.

    November 28, 2010
    by Alleyne
    Comments Off on From Drupal, to Joomla, and now WordPress

    From Drupal, to Joomla, and now WordPress

    Drupal kept breaking for unexplainable reasons, account passwords stop working for no apparent reason, password recovery system didn’t work, editing mysql entries didn’t work. I really liked how modular Drupal is built, but I’ll wait a few releases before trying it again. I want to spend some time actually creating content, not fixing shit that shouldn’t be broken.

    Joomla was tried, and not liked from the get go, doesn’t seem to be able to do much at all without digging into .css & .php files to put up something simple as your logo up.

    So now onto WordPress, this “should” be the most straight forward idiot resistant CMS of all. Is it built SmartLikeTruck Tough? I guess we’ll soon see.

    March 21, 2010
    by Alleyne
    2 Comments

    Beer kit done better? Updated

    A couple of weeks ago I picked up one of those cans of beer mix at the grocery store on sale. I’ve made fruit wine a few times already using nothing but water, fruit, sugar and yeast. I’ve been pleased every time except once with the wine, so I figured a pre-made beer kit would be dead easy. In typical SmartLikeTruck fashion I couldn’t keep myself from altering the process a little. The recipe calls for a 23 liter bucket to mix and ferment in, I only had an empty 16 liter bucket available, and I figured since I favor a slightly darker amber beer over the usual pale yellow stuff, I’ll try the mix a little thicker than standard. Other than using 6 to 7 liters less water, I’m following the directions pretty closely.

     Over the last 4 days I watched the bubbling of the airlock slow to the point where I’d get bored and walk away before a bubble happened so I figured it was time to bottle it.

    A quick tip brewing anything on the cheap, if you get your hands on some food grade buckets with the pop out pour spout. The corks that come in the glass carboy kits fit perfect in the spout mouth. Therefore no digging out the holesaw to make the right sized hole.

     To prep for bottling I went out and got my empty Grolsch flip top bottles from the shed. I consider these bottles to be a godsend for home brewing of wine and beer, you don’t need a corker or capper hanging around and of course you don’t need to buy corks and caps. These bottles were soaked in a pretty strong household bleach and hot water bath for about half an hour per sink full of bottles. After a good soak the labels peeled off pretty easy and the last of the label adhesive came off with a quick wipe with a nylon pot scrubbie. The bottles were then triple rinsed with scalding hot tap water. (our water heater is set way too high, but it works great for things like this)

    Once all the bottles were prepped, the next step was to add a level half teaspoon of sugar to each bottle. The sugar will be fermented in the bottle and naturally carbonate the beer.

    For transferring the beer to the bottles I just used a 5 foot length of clear pvc hose with a couple of spoons twist tied to the end to keep the siphon from sucking up the lees (yeasty muck at the bottom of the pail). I set the pail next to the sink on top of another container, so that the pail bottom was about 10 inches above the top edge of the sink, it makes the siphoning so much easier.

    During the bottling, 5 or 6 pints of beer was consumed, mandatory sampling for quality assurance dontcha know. The beer was just a little colder than room temp and had next to nothing for fizz but the flavor was awesome, pretty damn close to exactly what I wanted.

    From this point what could possibly go wrong? If too much sugar was added to the bottles, or if the brew wasn’t fermented enough I could be facing a batch of randomly exploding glass shrapnel beer grenades. So for the next week or so the beers will stay in boxes stowed in a commercial grade barrel liner (extra heavy duty garbage bag).

     This picture is of the kit that I used. It’s Canadian Adventure Ale from Danmar Wine and Beer Supplies.

    I’ll update after the first tasting in a week or so. If bottles start exploding, I may update sooner.

    Update:
    I’ve got 2 things I’ll do different with the next batch, both involve the sugar amounts.
    When bottling the beer I added 1/2 teaspoon of sugar to the bottles for carbonation, but this is for normal 350ml bottles. The Grolsch bottles are 450ml and 473ml, so this batch of bottles are a little flat.
    The other change with sugar will be less added for initial fermentation, this batch of beer is damn strong, like Colt 45 malt liquor strong. So the next batch the sugar for initial fermentation will be reduced to closer in ratio with the reduced water. I may purchase a hydrometer just to see how strong it really is.

    So in closing this experiment was not a total success, but I did end up with a batch of palatable hootch so not a total disaster either.